Horsetail Falls

OVERVIEW

Where: Alpine, starting from the Dry Creek Canyon parking lot, at the end of Grove Drive

Grown up difficulty: moderate

Five year old difficulty: moderate to difficult, due to steepness

Length and elevation: around 4 miles round trip with a 1800ft gain

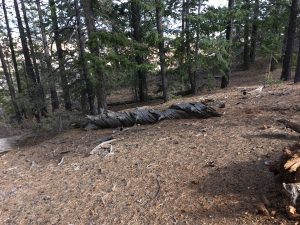
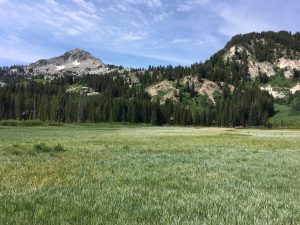
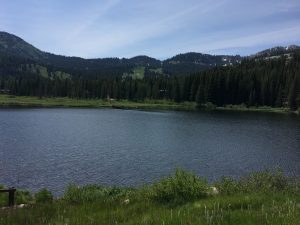
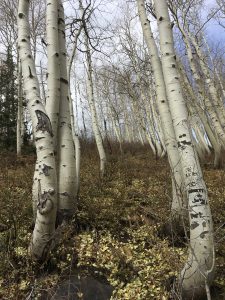
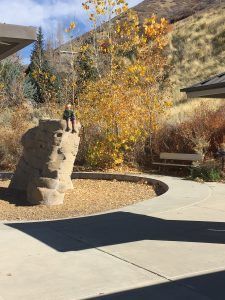
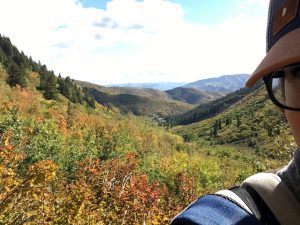
To see: dead and decaying horse, huge rock, meadow, aspens and pines, great view of valley

Busyness: medium

All Trails link: https://www.alltrails.com/trail/us/utah/horsetail-falls-trail

DETAILS

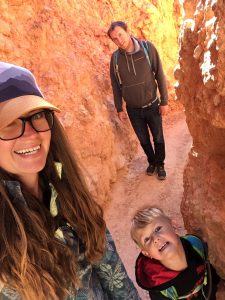
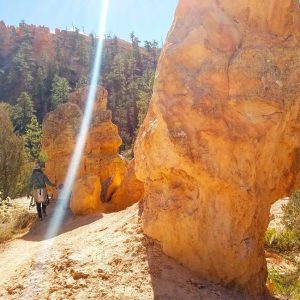
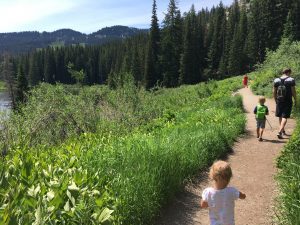
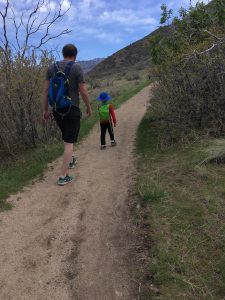
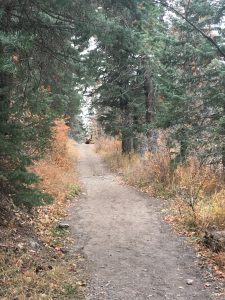
This is a steep and beautiful hike. After a short exposed climb (by feet; no rock climbing needed), you’ll enter a forest. A horse died right off the trail in the summer of 2017, and if it’s warm you will smell it. It’s close to the beginning of the forest portion of the trail. Around ½ of the way to the overlook of the falls is a clearing with a massive boulder where my kids like to take a long rest and explore a bit.

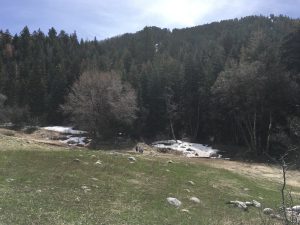
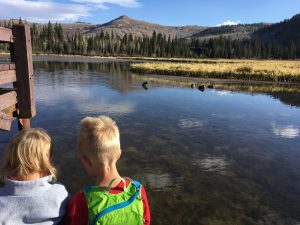
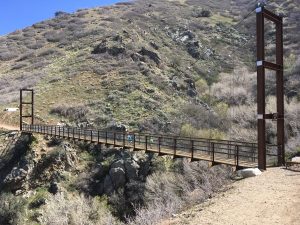
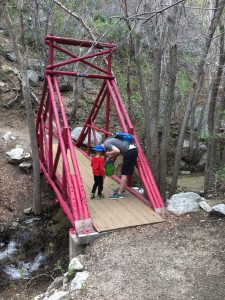
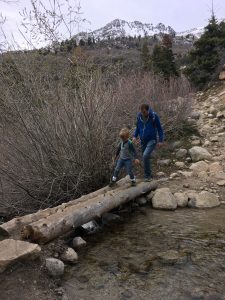
Five to ten minutes after the rock is the meadow. Sometimes we call it here, and rest and eat and turn around. Sometimes we continue on. The trail after the meadow is through stream beds, and in the spring will be very wet and muddy. We did this hike at the beginning of November and it was still muddy in parts. The trail splits and rejoins in two or three portions after the meadow as well. You’ll pass over two small streams that cross your path, and one has a log bridge over it, and the other is small enough to step over.

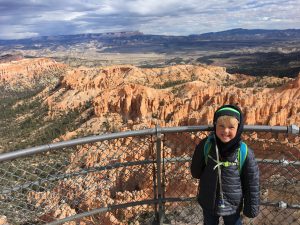
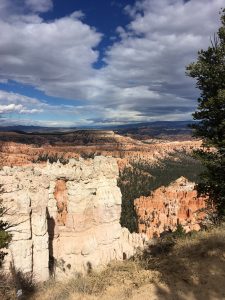
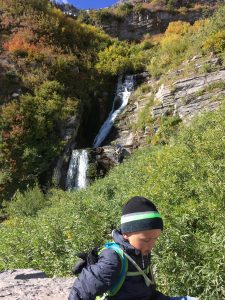
After the streams, there will be a small trail off to the left of the main trail. This takes you quickly to the overlook, where I prefer to stop if I’m hiking with kids. We sit, snack, take pictures, and rest. This spot is visible on Google maps, because the spot is a huge granite block that has no tree cover.

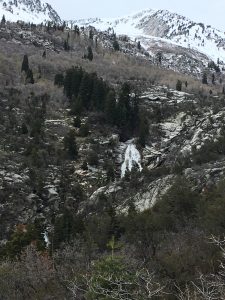
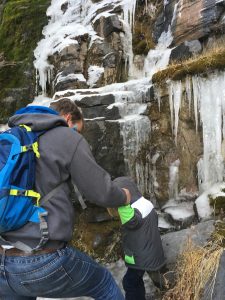
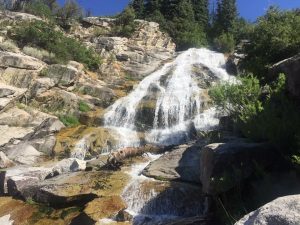
If you want to continue on, you can go back to the trail fork or climb through some boulders ahead. The trail stays steep as you get closer to the waterfall. To get to the base of the waterfall, keep your eyes out for a hard to spot trail on your left. Sometimes there is a rope here to help with the descent and ascent here, since it’s quite steep and has very loose dirt. Hiking through some brush will take you to a place to climb down to the base. If you choose to get in the water, be very careful. I played around in the water with some friends (no kids came with us) and ended up falling hard and sliding down rocks and hitting my head. The rocks are extremely slick due to moss and there is no grip in some areas, therefore I would not take young children down to the waterfall. If you do, be safe.

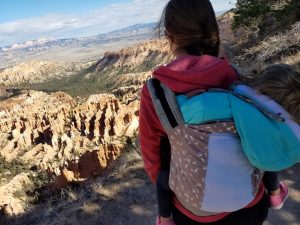
Another option is to continue on and find the trail that takes you above the waterfall. We did with our children, and while there are great views of the valley, the cairns take you past the waterfall and you can’t see the waterfall anymore. It was a disappointment to us and our kids. Consequently we prefer to stop at the overlook, and everyone is happy.

REVIEW

Faves: the final views, the magical forest the trail goes through, looking out for the trail markers (dead horse, big boulder, meadow)

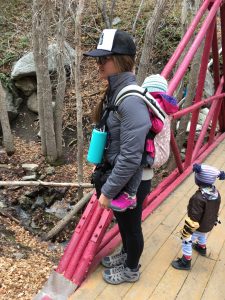
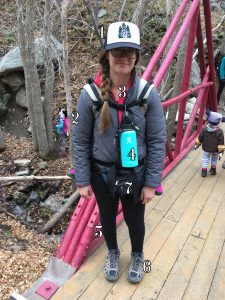
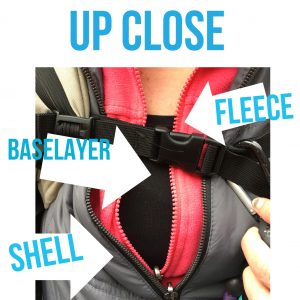
Gear: shoes with good traction, kids’ hydration pack, walking sticks if you want more support hiking down, carrier, water bottle, snacks on snacks on snacks

Bryce Canyon National Park-Day 2

We stayed at an Airbnb in Brian Head between our days at Bryce Canyon. It was kind of far away, but we really enjoyed getting to see a part of Cedar Breaks National Monument as well as explore a little ski town. Plus our Airbnb had an indoor pool and a full kitchen. We like renting condos and small homes so that we can save money by bringing and cooking our own food.

For day two, we’d decided to hike the Queen’s Garden and Navajo Loop. This is a longer but much more scenic hike than what we did on day one.

OVERVIEW

Where: Bryce Canyon, beginning from Sunset Point OR Sunrise Point (we started at Sunrise Point which apparently isn’t recommended)

Grown-up difficulty: easy-moderate

Five year old difficulty: moderate

Length: 2.5-3 miles

To see: hoodoos, evergreens, Thor’s Hammer, caves, birds

Busyness: moderately busy

Alltrails link: https://www.alltrails.com/trail/us/utah/navajo-loop-and-queens-garden-trail

NPS link: https://www.nps.gov/brca/planyourvisit/qgnavajocombo.htm

DETAILS

As mentioned above, we started from Sunset Point which I didn’t realize the NPS doesn’t recommend. We hiked down a few switchbacks into the canyon floor where we were surrounded by hoodoos and caves and firs. It was very exciting to get to be so close to the scenery we’d seen distantly the day before. My anxiety was much calmer this day, as there were just a few cliffs-mostly safe hiking. The kids were able to run a bit and let out energy. We spotted a Stellar’s Jay (able to identify thanks to these again!) that followed us around for awhile.

The kids loved finding caves to hide in. It was a tad chilly in addition to the natural shade, so base layers and fleece were necessary. Check out my posts on cold weather gear if you need help figuring out what will keep you and your kids warm. The Queen’s Garden was structurally interesting, and we loved hiking through some windows in the wall.

The last portion was hard on all of us. Our 2 year old was napping in the KP on my back, and hiking up all of the switchbacks was kind of miserable. But we did it! And it was totally worth it.

REVIEW

Faves: being IN the canyon, surrounded by the red hoodoos and the bright green evergreens

Gear: base layers for all, hiking boots if you have weak ankles like me, day packs with water and snacks, Pocket Naturalist Guides to entertain the kids (and distract them from being tired), hats, fleece jackets

Bryce Canyon National Park-Day 1

One of the biggest reasons I don’t want to leave Utah is the accessibility to so many national parks. We took the kids to Bryce Canyon in November and had a blast. The first day we hiked from Sunset to Sunrise point, and the second day we hiked Navajo Loop and Queen’s Garden together. Each day was a total of 2-3.5 miles.

OVERVIEW

Where: Bryce Canyon, beginning from Sunset Point

Grown-up difficulty: easy

Five year old difficulty: easy (but watch out near the cliffs!)

To see: hoodoos, evergreens, twisty trees, red rocks and blue skies

Busyness: depends on time of year. Not busy in November.

I can’t find a good Alltrails for this hike, but here’s a NPS link.

5 year old

DETAILS

We drove straight to Bryce from our home in Utah County. We went right to Sunset point and had lunch. I’d packed sandwiches and fruit before leaving and after several hours in the car, the kids were ready to get out. I love having a larger cooler with a strap (we use one similar to this all the time, but I dream of one of the YETI coolers!), and these Ziploc lunch containers. We ate close to the parking lot, cleaned up and changed the baby’s diaper, and went on our hike. It was so windy and my hat blew off, past the fence.

The trail was mostly good, but I have anxiety and there were a few points (right at the beginning, and close to Sunrise point) where I was freaking out a bit. I walked in front and put my husband in charge of the 5 year old so that I wouldn’t compulsively yell at them. We loved looking at the hoodoos, the green trees poking out around them, and the naturally occurring windows through some rocks.

We talked about the different foliage around, the varied landscape, how water is such a driving force behind land formations. It was cold enough that the deciduous trees had all lost their leaves, and we got to examine the various evergreens around. One of our favorite things to bring on adventures are these Pocket Naturalist Guides. The wildlife one is probably our favorite, but we love the tree & wildflower and bird ones too.

As always, the two year old took a nap in the Kinderpack. It has the best sleepy dust.

We needed some good baselayers for this, and good hiking shoes. Need winter gear help? Check out my posts on Adult Gear and Kids Gear.

REVIEW

Faves: the contrast of the hoodoos and sky, being able to see for miles.

Gear: I appreciated my hiking boots. We used the KP as always, daypacks for snacks, warm clothes for late fall.

What’s your favorite national park? Mine isn’t Bryce, but it was fun.

Accessible Hikes: Silver Lake Loop, Brighton

Before kids, I worked in Early Intervention. I helped provide developmental services to young children ages 0-3 with delays and disabilities. Some kids needed less support than others; some kids have lifelong needs. Several kids I worked with are in wheelchairs and always will be. When I’m in the mountains, those kids are often on my mind. Finding ways to share love of outdoors is important to me, and I wish the outdoors were less discriminatory. Being aware of wheelchair accessible hikes is important to me-please reach out to me if you know of some!

There are options, though. Paved trails are open to wheelchairs and bikes, and both Utah and Salt Lake Counties have some great ones. One is Silver Lake Loop, up at Brighton. This location is the trailhead for at least a few hikes, but the beginning is a loop around a lake that is open to all abilities. It is definitely wheelchair accessible. 

OVERVIEW

Where: Big Cottonwood Canyon, near the Nordic Center

Grown up difficulty: easy

Five year old difficulty: easy

Length and elevation: around 1 mile with a 50 foot elevation change

To see: wildflowers in the spring and early summer, lake, fish, aspens, moose sometimes

Busyness: busy on weekends

AllTrails: https://www.alltrails.com/trail/us/utah/silver-lake-loop-trail

SUMMARY

This hike is a hit for my kids. It’s wheelchair accessible, has a couple places to fish, and we’ve seen a moose here too! The wildflowers here in the summer are unbelievable-we got to see lots of elephants’ head and mountain bluebells in the spring.  We got a lot of use again out of our Pocket Naturalist Guidebook here as well. Oh also, Pokemon Go works here.

DETAILS

A lot of the hike is exposed, but there is a portion through the woods. We love watching the aspens change over the seasons, and there are some great climbing rocks around too. The mountainside of this trail branches off for hikes for Lake Solitude and Twin Lakes Reservoir. These are great hikes as well, but not wheelchair accessible.

This is such a good hike for beginners, for differently abled people, and for a quick trip up the mountains. Check out this blog post, where a family with a daughter in a wheelchair went to this trail.

REVIEW

Faves: aspens and water, short, little elevation gain

Gear: little to none! You can take a lot if you want, and none if you want. Strollers and wheelchairs can use this trail.

But What Do You Look Like?

In my posts, I talk a lot about gear. I’ve collected a decent amount (for me, at least), and have a system that works really well for me. It’s slightly embarrassing, but to get outside for a few hours with kids is a lot of work!

You’ve seen my post on clothing in winter, so start with that as a template. As a reminder, it’s baselayers, fleece, windbreaker, wool socks, a hat and good shoes. Then I put my 3 year old up in the carrier. We use the Kinderpack. Next is the fanny pack. I know, okay, but I need a way to carry my shit. Inside the fanny pack are snacks, my PStyle, keys, phone, kleenex, sometimes bug spray or sunscreen. Then I clip my water bottle to my carrier straps with a carabiner.

So with the above picture for reference:

1-hat from Little Canyon Outfitters

2-shell from Steep and Cheap

3-fleece over baselayer top

4-water bottle clipped to carrier with carabiner

5-doubled up baselayer tights

6-wool socks + hiking boots

7-fanny pack

My five year old has his own hydration backpack, which is stuffed with his own snacks. Lastly I’ll put on gloves.

Initially I felt ridiculous, but this set up is really comfortable and basically lets me carry everything I need and want. I’ve got water and snacks, my phone and keys, my baby.

Bear Canyon Suspension Bridge

Overview

Where: Sandy, starting from Orson Smith Park

Grown up difficulty: moderate to easy

Five year old difficulty: same

Length and elevation: 2 miles, 450 ft elevation gain

To see: Salt Lake valley, cool bridges, river

Busyness: lightly trafficked to moderately trafficked

https://www.alltrails.com/trail/us/utah/draper-suspension-bridge

summary

One of my friends recommended this hike to me. The alltrails for it looked amazing, so we made a local event and went! It was a blast. The beginning is switchbacks from a neat little kid centered rock climbing park, until you get to the Bonneville Shoreline trail. Then it’s pretty flat to get to the (rather large) suspension bridge. This is a very exposed trail, so dress accordingly.

details

I’ve only ever started at Orson Smith Park which has a couple of covered picnic tables, and a bathroom. To the immediate east is the trail. Several switchbacks have you gain elevation at a pretty good pace. After a few you’ll come to a flat trail. This won’t take you to the bridge-keep going up! The trail continues up more switchbacks until it reaches the Bonneville Shoreline trail.

This trail will take you slightly around the mountain, after passing a sign for Cherry Canyon Logging trail. Stay on the flat trail; don’t go up unless you want a much more intense hike. Pretty soon you’ll start to see glimpses of the bridge. I was stunned when I first saw it because it was much bigger than I expected.

My kids like to give me a heart attack and hop across the bridge. It is fun and a little trippy to walk across the bridge as it sways. We have a good time here and usually have snacks on a bench on the side of the bridge.

Then, we head up to another bridge! This one is just a couple minutes up from the suspension bridge. It’s little and painted red, and right over a small stream my kids like to play in when it’s warm.

When it’s warm out, this is a great shaded place to sit and eat lunch before heading down.

Review

Faves: the suspension bridge! Totally worth the effort to get to it.

Hardest: the switchbacks

Gear: a carrier if your child isn’t ready to hike alone (love my Kinderpack!), hydration pack/water bottles, hiking shoes or tennis shoes, snacks, hats, sunscreen

Adult Winter Gear


It’s cold! Winter can be a deterring time to get outside, but good layers make a huge difference. I’ve got your basics here, with lots of jacket options because I love them.

Fleece

Basics

-NO COTTON

-Baselayers (wool or silk or synthetic)

-Insulating layers (I use fleece)

-Windproof/waterproof shell

-Wool socks

-Boots

-Gloves

-Hats

-Baby carrier

-Water bottle or hydration pack

-Fanny pack

Details

Start with good base layers! I have loved the Paradox base layer tights, which are a wool blend. I found mine at Costco a couple of years ago, and then bought more on eBay. 32degrees is a great brand as well, with synthetic base layers and awesome and affordable packable down jackets. With these tights, I layer two together as one alone is see through (found out the hard way!).


As above, on top of my baselayer shirt, I use fleece pullovers or jackets. Both my Columbia fleece and my The North Face fleece work great. The North Face one seems to hold on to stink more easily, but both keep me very warm. If you feel like treating yourself, try this Patagonia pullover-I wish all of my clothes were made of this material!


Rain/wind jacket on top

When it’s a windy day but not too cold, I’ll put a shell on top-I like this, and it works for rain too. If it’s pretty cold and windy, I’ll put an insulated jacket on. Usually, since we don’t ski or snowboard and I have a kid strapped to me, I don’t need a true snow shell to keep warm. But I have this in case I do, like when we sled together. 

In this picture above, it was 45-50 degrees and windy. I had doubled up Paradox baselayer wool blend tights, 32 Degrees baselayer long sleeved shirt, Columbia fleece, hiking boots, and Kinderpack. All day I was toasty, and a little too warm at points with the baby on my back. I love my wool socks from Costco (no longer available), and use snowboots from there too by Khombu. I can’t find the exact ones, but these look similar.

KP for life

My favorite baby carrier is the Kinderpack. While pricier than some options, they are worth every penny if you can swing it. I’ve tried other carriers (Tula, Ergo, stretchy wraps, woven wraps) and for hiking, the KP is bomb. It’s extremely comfortable, has well padded straps, and a great knee to knee seat. I’ve had mine for almost 2 years and it is still in great condition, after hundreds of miles of hiking and day to day use.

^ Me, all geared up.

What are your favorite things for winter?

Kids’ Winter Gear

I really believe that appropriate gear makes all the difference. Since we’re in winter, I’m going to start with cold weather gear.

4 year old in winter gear

Kid Winter Gear Basics

-Baselayers

-Insulating layers

-Windproof/waterproof shell

-Wool socks

-Boots

-Gloves

-Hats

-Hydration pack

Details

We have had fantastic results with Costco’s selection of baselayers, snowsuit and hat combos, and gloves for our kids. The brand of baselayers is 32 Degrees, and the snowsuit, hat, and gloves are Gerry. I’m not finding a specific website, but Amazon sells this brand.  We got four years out of one snowsuit between our two kids, and passed it to a friend because it has years left. I’ve tried an Old Navy bib and snow jacket on my oldest, but the bib had a hole in the knee in one winter of use. The Costco one held up much better.

My five year old loves his baselayers, by the way. Pro tip: put on baselayer bottoms, then put wool socks over the bottom of the pants, and then pull on the fleece or whatever type pants you’re putting on top. The socks keep the baselayers from rolling up.

We’ve loved these wool socks off Amazon, and have found snowboots second hand at Kid to Kid. I also like having fleece pants on hand to go on top of the baselayers. These have worked well, though they run small (especially if you cloth diaper!). I’ve used fleece pajamas as an alternative as well. Cutting off the feet can help the socks fit into boots.

My son has had this hydration pack for almost a year now. It holds enough snacks for him and his sister, and enough water. I love the whistle on the buckle (well, in theory) and the magnet that keeps the tube in place.

Hiking mama and kids (and fleece)

What am I missing? What are your favorites?

Timp Falls

Fall colors behind Timp

Quick Look

Where: Alpine Loop, Mt Timpanogos trailhead

Grown up difficulty: easy

Five year old difficulty: easy

Length and elevation: This is a guess-3 miles and 800 ft gain

To see: aspens, mountain peaks, glacier, waterfalls

Busyness: not too busy during school days, busier in summer and on weekends

Note: This link is for the entire Mt Timp summit trail. The waterfalls are only 1-1.5 miles in.

Alltrails link: https://www.alltrails.com/trail/us/utah/mount-timpanogos-trail-from-aspen-grove

Through the aspens

Detailed Summary

This hike is a family favorite for every season but winter-only because we’ve never tried it in the winter. Most of the trail is actually paved, though narrow. You can see the waterfalls from almost the beginning. In the spring, many plants are covered with tent caterpillars. Flowers bloom all along the trail and the little valley behind Timp. There’s decent shade all along, and areas to sit and watch the waterfall once you reach it.

If you continue on past the first landing, you’ll come to a switchback and then to a second set of falls. These are my favorite, as you get a great view of the landscape and the falls are less traversed. I have tried snowshoeing with adults on this trail, but we lost the trail quickly and just played around. Depending on the winter, the trail may be covered with ice and you’ll need spikes or crampons. Usually we can hike this trail from late May through November. In September, be wowed with the changing leaves. It’s wonderful.

Fall colors on the trail

Faves: watching the foliage change through the year, the second set of waterfalls

Hardest: none

Gear: carrier if you have a child that cannot walk the whole trail (Kinderpack is my favorite), fanny pack for snacks and bug spray/sunscreen, water bottle with carabiner to hook to chest clip, hiking shoes or sandals, kids’ hydration pack, hats